Here are the steps I took to digitize some old analog home videos. It might not be the best, but it works at least for me.
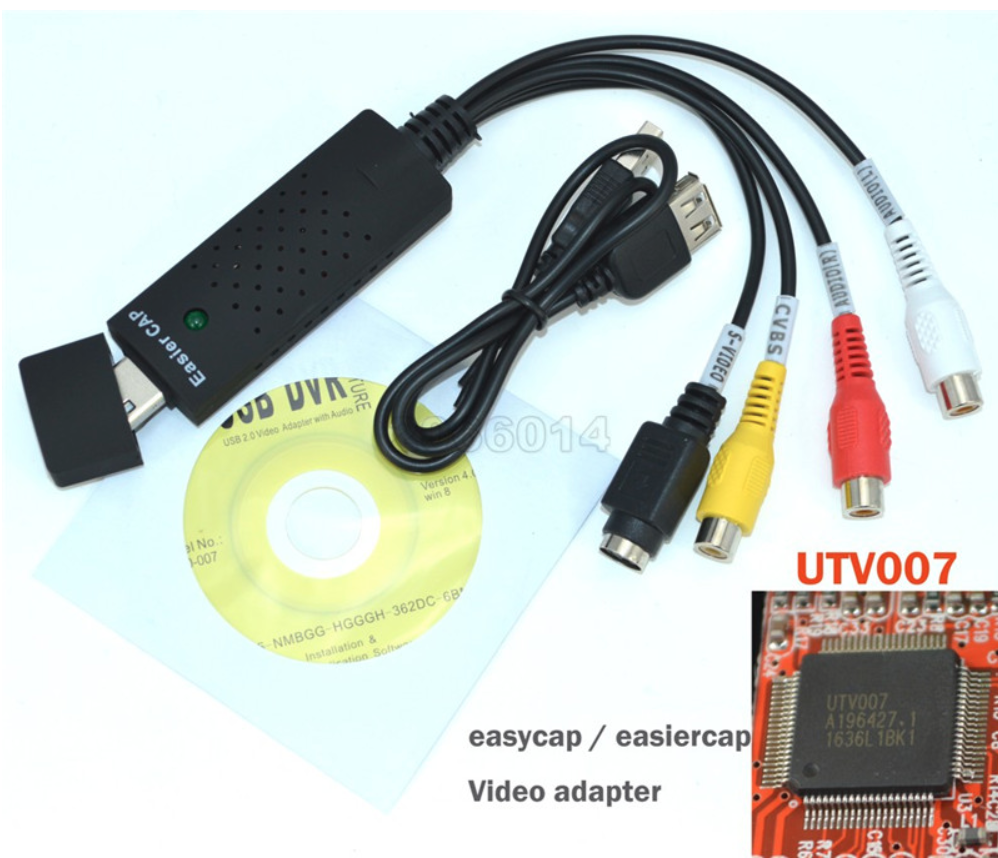
I have an old Sony Hi8 camcorder from around 1999, which has a composite video output. To connect the composite video output to a PC, I bought this 5-euro USB stick from AliExpress:
I have a Windows 10 Home PC. Do not insert the DVD that comes with the chinese USB stick, you don’t need it for anything. It has some outdated software with viruses. Just install VLC. Windows has drivers for the device.
Connect the camcorder composite video out to the USB stick. Connect camcorder audio out directly to PC microphone input (use a RCA->3.5mm stereo plug cable). You could connect audio to the USB stick but I had terrible sound quality with that setup.
Start up VLC. Follow these steps:
- Select “Media/Convert / Save…”:

- Select “Capture Device” tab. Do selections as here, then click “Convert / Save”:

- Select “Deinterlace”, do *not* select “Display the output”, it ruined my output file at least. Select destination file. Choose profile “Video – H.264 + MP3 (MP4)”. Click the tools icon next to it:

- Choose “Video codec” tab, select H-264:

- Choose “Audio codec”, select “MPEG Audio”:

- Choose “Encapsulation”, select MP4/MOV, click save:

- Click “Start”:

- Next, a series of pop-up windows should open. If not, make sure you checked “Device properties” in step #2 earlier. Choose “PAL_D”:

- Apply, OK:

- Apply, OK:

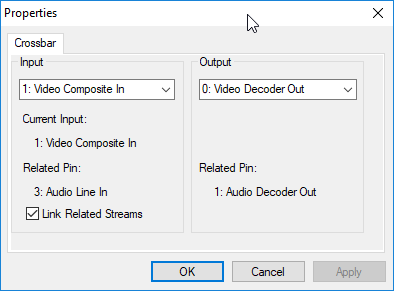
- Select “Video Composite In”, check “Link Related Streams”, click “Apply”:

- It should look like this now, click “OK”:

- Now the pop-up display disappears. Just press “Play” on your VCR/camera and hope for the best. Better first try a few minutes, then stop and check results, and possibly return to first square. I did that dozens of times to get the knowledge to write this post…
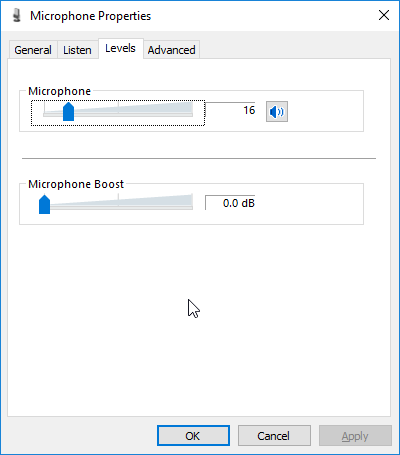
You may need to check windows control panel / microphone properties and lower the levels, to get less noise into output file. You need to experiment yourself, but this works for me:

I use ffmpeg to finalise the file. After that it plays on a Mac and on PS4. For some reason the windows build does not have all codecs so I do it on a Mac. This command will repackage the mp4, leaving the video original but converting the audio to AAC. It also cuts 5 seconds from the beginning and makes the video 1 hours and 35 minutes long:
ffmpeg -i original.mp4 -c:v copy -c:a aac \
                -ss 00:00:05 -to 01:35:00 fixed.mp4

